5 min read
Learn to make a web app with ASP NET Core and Vue

In this article, I will teach you the basics of making your own web app, by creating a checklist app. ASP NET Core will be used to create a CRUD API and Vue will be used to create the frontend UI. Using the knowledge gained here, you should be able to apply it to start making your own web apps. You can find the complete solution in the GitHub repository.
We will first start with building the API and then move on to the Vue client.
Creating a checklist API
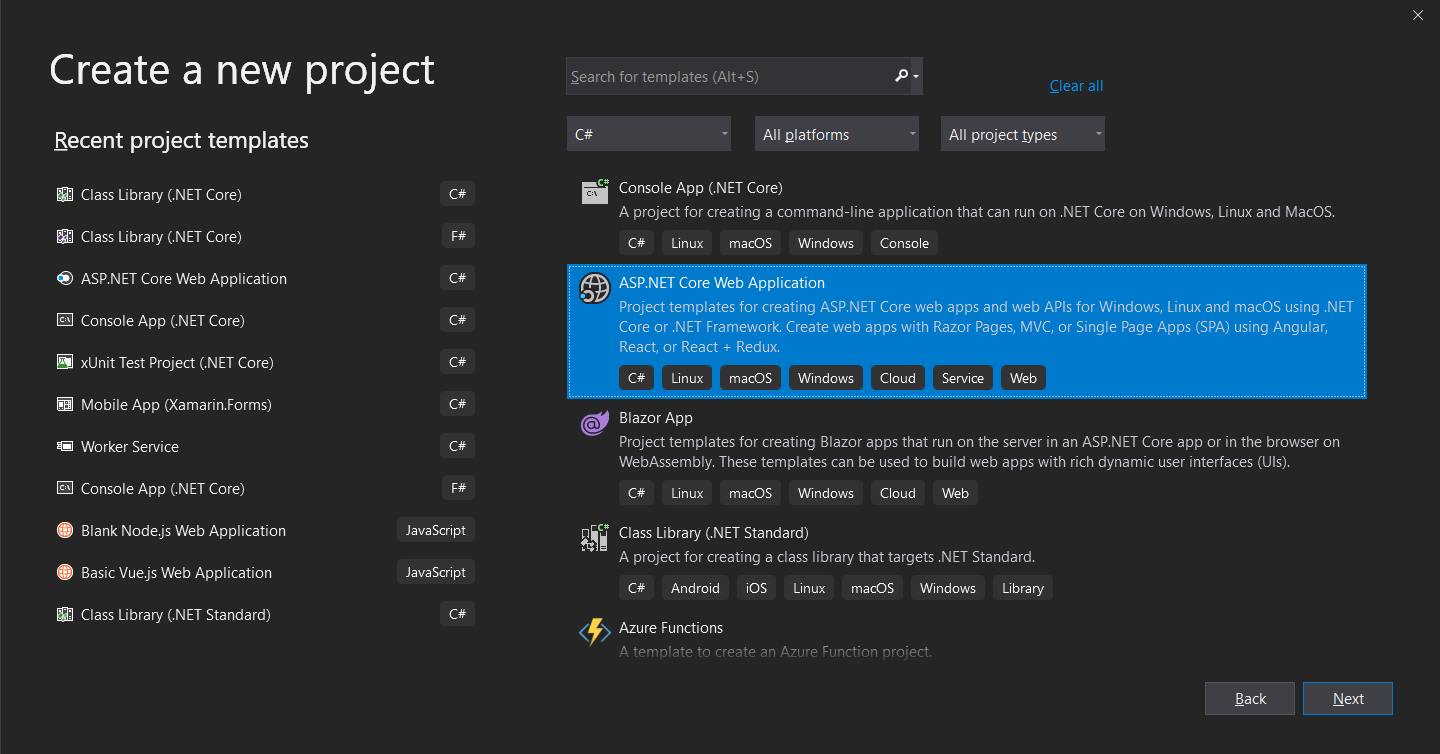
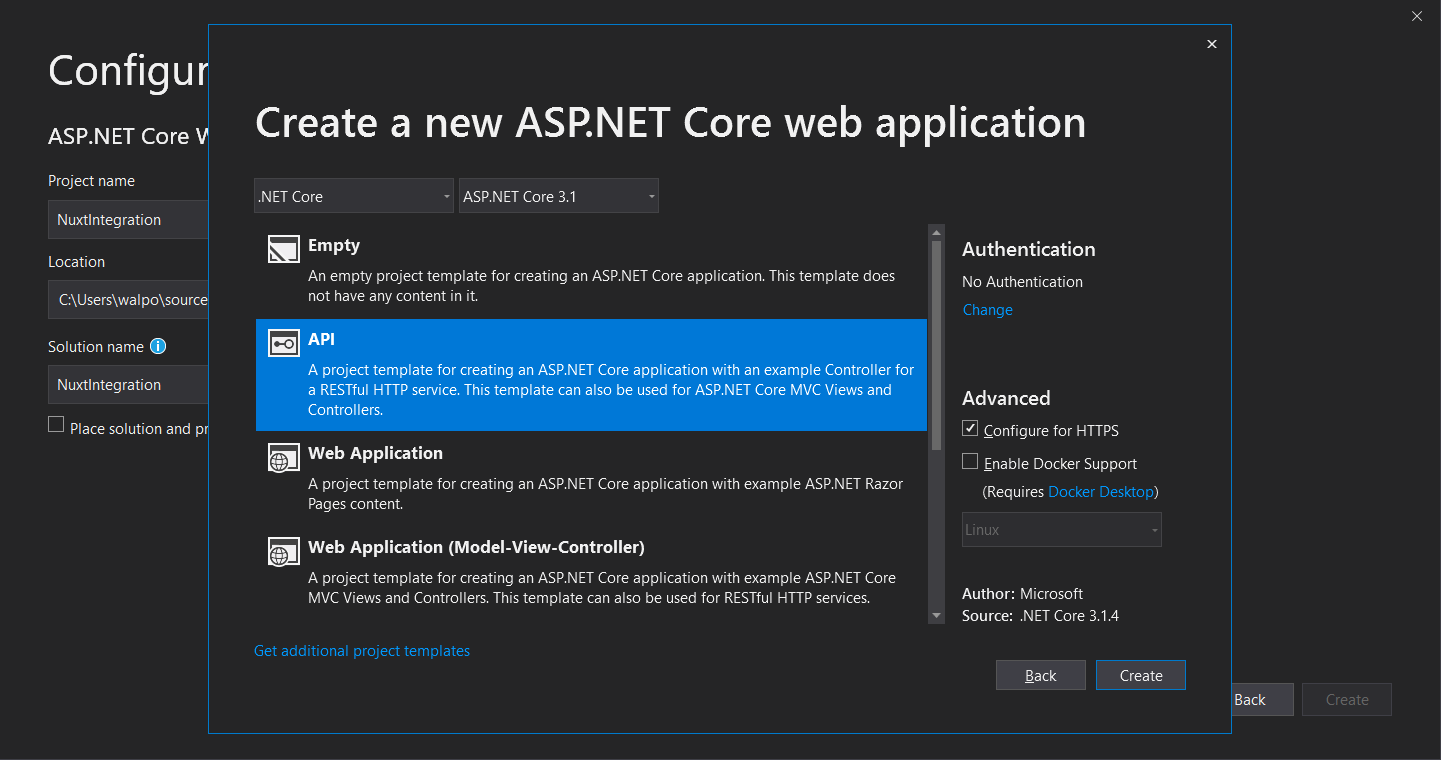
Start by creating a new ASP NET Core Web API project in Visual Studio.
Let's start by creating the checklist item model. Create a folder called Models and inside create a file called ChecklistItem.cs
public class ChecklistItem
{
    public int Id { get; set; }
    public string Text { get; set; }
}
We have given it an Id, which will uniquely identify this item when we save it to a database, and a Text property which will contain the text that we enter for the checklist item.
Next, we will configure the database. To help simplify this tutorial I am using an in-memory database. This is fine for testing and demonstration purposes, but for a real life app you will need to configure your own database (in terms of code, this is as simple as changing the data provider in the EF Core options).
First install the following NuGet packages:
Microsoft.EntityFrameworkCore
Microsoft.EntityFrameworkCore.InMemory
Then create a new file at the root folder of the project called AppDbContext.cs:
using ASPNETCoreVueChecklist.Models;
using Microsoft.EntityFrameworkCore;

namespace ASPNETCoreVueChecklist
{
    public class AppDbContext : DbContext
    {
        public AppDbContext(DbContextOptions options) : base(options)
        {
        }

        public DbSet<ChecklistItem> ChecklistItems { get; set; }
    }
}
EF Core is a object-relational mapper (ORM), which simplifies the process of interacting between C# code and the database. The AppDbContext class provides a way to access the records within the database. By providing it with a property called ChecklistItems, with a type of DbSet<CheckListItem>, this configures EF Core to look for a table in the database called ChecklistItems, with columns defined by our model.
Then to configure our app to use this AppDbContext class and to use an in-memory database, go to the ConfigureServices method of Startup.cs and add the following lines of code:
services.AddDbContext<AppDbContext>(options =>
{
    options.UseInMemoryDatabase(nameof(AppDbContext));
});
Finally, we need to create the controller, which in ASP NET Core defines the endpoints for our API. Start by creating a ChecklistController.cs file within the Controllers folder:
using Microsoft.AspNetCore.Mvc;

namespace ASPNETCoreVueChecklist.Controllers
{
    [ApiController]
    [Route("[controller]")]
    public class ChecklistController : ControllerBase
    {
        private readonly AppDbContext _dbContext;

        public ChecklistController(AppDbContext dbContext)
        {
            _dbContext = dbContext;
        }
    }
}
As it stands, the controller has an ApiController attribute, which configures the controller to be used for an API (instead of a standard ASP NET MVC controller), the Route attribute states that all endpoints will be prefixed by the name of the controller (checklist), and we are injecting an instance of our AppDbContext class into the controller so that we can use it to access our checklist items.
I will now walk you through adding each of the CRUD methods to the controller, starting with Create:
[HttpPost]
public async Task<int> Create(ChecklistItem item)
{
    _dbContext.ChecklistItems.Add(item);
    await _dbContext.SaveChangesAsync();

    return item.Id;
}
The above method has the HttpPost attribute, which means it can only be accessed by sending the Http request using the POST method. This is standard for creating records in APIs. We create a new instance of ChecklistItem using the text parameter that is passed to the method. We don't need to worry about setting the Id ourselves as a unique Id will automatically be set when we save the item to the database. The following lines add the item to the database and then save it. We finally return the new item Id back to the client.
Next we will move on to Read. Typically with such an API, there are two read methods: one to list all items, and one to return one item that matches the supplied Id.
[HttpGet]
public async Task<IEnumerable<ChecklistItem>> Get()
{
    var items = await _dbContext.ChecklistItems.ToListAsync();

    return items;
}

[HttpGet("{id}")]
public async Task<ChecklistItem> Get(int id)
{
    var item = await _dbContext.ChecklistItems.FirstOrDefaultAsync(item => item.Id == id);

    return item;
}
The first method is set to return a list of all checklist items when the HTTP GET method is used on the controller (/checklist). The second is similar apart from we set it to require the Id of the checklist item in the URL (/checklist/1). This will take the Id as a parameter and search the database for an item with that Id. It will then return that single Id back to the client.
The next method is Update:
[HttpPut("{id}")]
public async Task<bool> Update(int id, ChecklistItem item)
{
    var existingItem = await _dbContext.ChecklistItems.FirstOrDefaultAsync(i => i.Id == id);
    existingItem.Text = item.Text;
    var result = await _dbContext.SaveChangesAsync();

    return result > 0;
}
Typically updating is done with the HTTP PUT method and we are setting the route to require the Id of the item we wish to update (checklist/1). First we retrieve the item that we wish to update, modify the text, then save it back to the database. The return value of SaveChangeAsync is an integer representing the number of items that got updated. Therefore by checking if the number of updated items is greater than 0, we know that the update was successful.
Finally we have the Delete method:
[HttpDelete("{id}")]
public async Task<bool> Delete(int id)
{
    var item = await _dbContext.ChecklistItems.FirstOrDefaultAsync(item => item.Id == id);
    _dbContext.ChecklistItems.Remove(item);
    var result = await _dbContext.SaveChangesAsync();

    return result > 0;
}
Similar to the previous methods, the Id of the item the is to be deleted is included in the URL, but this time we use the HTTP DELETE method. It might seem a bit peculiar, but in EF Core the way to delete items involves: first retrieving the item from the database, setting it to be removed, the saving the database (which deletes the record).
The final thing that we need to do is to go to the Startup.cs file and add a CORS policy to the Configure method. This should appear between the app.UseHttpsRedirection() and app.UseRouting() lines. This allows the web API to accept requests from our client (NOTE: the default port for new Vue apps is 8080, but if yours is different update the code to use the port of your client).
 app.UseCors(builder =>
{
    builder
        .WithOrigins("http://localhost:8080")
        .AllowAnyMethod()
        .AllowAnyHeader();
});
That is now our API completed. We have implemented all the CRUD operations, which can be accessed via various HTTP methods. We will now move on to creating a Vue frontend, which will be able to access these API methods.
Creating a checklist client
First make sure that you have the Vue CLI installed. If not, please visit this page. Then navigate to the root folder of your project and run the following command to create a Vue project:
vue create checklist-clientStart by creating an empty Checklist.vue file in the components folder. Then go to App.vue and update it to simply display the Checklist component.
<template>
  <div id="app">
    <Checklist/>
  </div>
</template>

<script>
import Checklist from './components/Checklist.vue'

export default {
  name: 'App',
  components: {
    Checklist,
  }
}
</script>
Next open up the Checklist.vue file. We'll start by creating an input to create checklist items:
<template>
  <div>
    <input type="text" v-model="newItemText" />
    <button @click="onClickSave"> Save </button>
  </div>
</template>

<script>
export default {
  data() {
    return {
      newItemText: ''
    }
  },
  methods: {
    async onClickSave() {
      await fetch('https://localhost:5001/checklist', {
        method: 'POST',
        data: this.newItemText
      })

      this.newItemText = ''
    }
  }
}
</script>
Here we bind our input to the newItemText data property, meaning that any changes to the value will be reflected in the input and the property. We also create a save button, which calls the onClickSave method when it is clicked. Within the onClickSave method, we send a POST request to our API at the /checklist endpoint. The data is simply the text that was contained within the input field. If the request is successful, then the input text will be cleared.
Please note that the port I have used may not be the same as yours. Please check your own API project to see which port your API is running on.
At this stage, we can create new checklist items, but we can't see them. Lets create a list of items pulled from the database. Start by creating a data property called items:
data() {
  return {
    newItemText: '',
    items: []
  }
},
And then create a loadItems method within the methods object:
async loadItems() {
  await fetch('https://localhost:5001/checklist', {
    method: 'POST',
    headers: {
      'Accept': 'application/json',
      'Content-Type': 'application/json'
    },
    body: JSON.stringify({ text: this.newItemText })
  })

  this.newItemText = ''
}
This will make a HTTP GET (this is the default for fetch so we don't need to explicitly define it) call to /checklist. We then process the response as JSON and set the resulting list of items to the items property that we just created.
We want to load this data when we first visit the page. To do this, we make use of the mounted method (this sits at the root of the Vue object. Please see the GitHub repo for more clarity), which gets called when the page first loads:
async mounted() {
  await this.loadItems()
},
In addition, we should add this line (await this.loadItems()) to the end of the onClickSave method so that the list updates when we create a new item.
We will then create the list items in the markup up to display the items that we have just fetched:
<ul>
  <li v-for="item in items" :key="item.id">
    {{ item.text }}
  </li>
</ul>
The final thing we need to do is to allow the user to delete existing items. Let's create a method to allow us to do that:
async onClickDelete(id) {
  await fetch(`https://localhost:5001/checklist/${id}`, {
    method: 'DELETE'
  })

  await this.loadItems()
}
And then create a button on each list item that deletes that list item. The item Id is passed to the onClickDelete method, which in turn is passed as a URL parameter to the /checklist/:id endpoint.
<li v-for="item in items" :key="item.id">
{{ item.text }}
<button @click="onClickDelete(item.id)"> Delete </button>
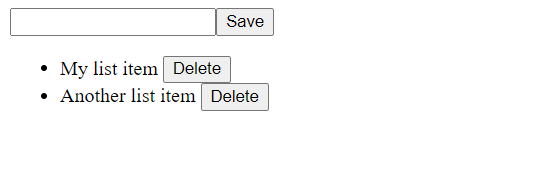
</li>And that's it. Make sure both projects are running and open the Vue project in the browser. You should now be able to create new items, see a list of existing items, and delete existing items.
Conclusion
In this article I have showed you how to create a basic CRUD API using ASP NET Core, and hook it up to a Vue frontend to create a checklist web app. The GitHub repo can be found here.